Working with non-model species can be somewhat challenging due to the lack of compatible software and databases. Today, we’re going to address a common issue encountered when working with these types of species: protein network analysis. To do this, we will use the online tool STRING. Following this step-by-step guide, we will show you how to reach the final protein network.
1. Accessing the Tools
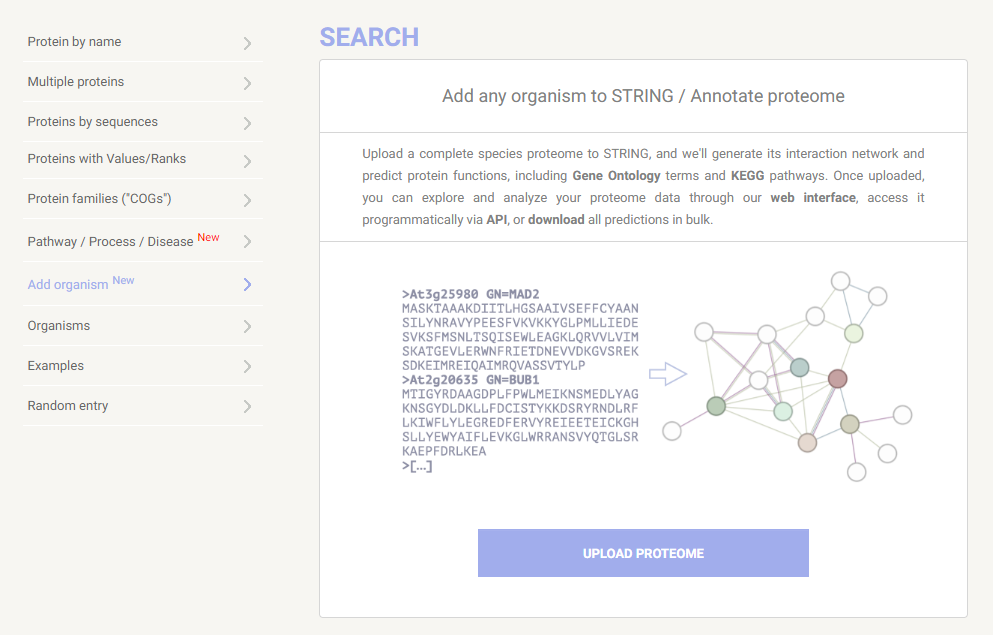
After logging in, we will navigate to the “Search” tab, where we will find all the tools that STRING offers. In this case, since our species is not available in its extensive database, we will proceed to the “Add organism” section.
2. Looking for the Taxonomy ID
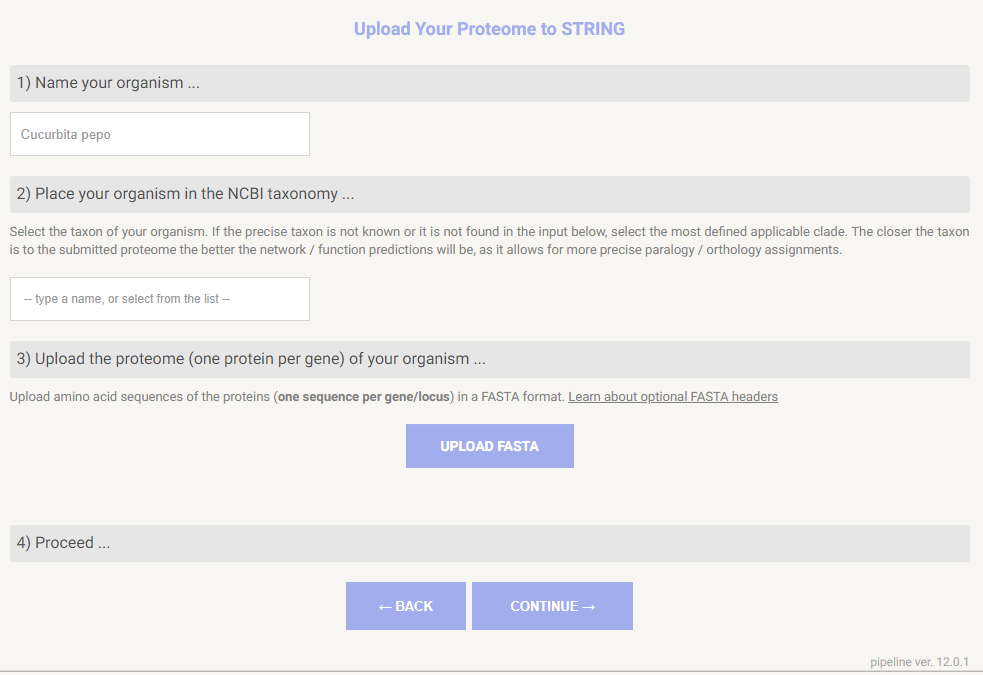
For this tutorial, we will use the species Cucurbita pepo as an example, which is of significant economic importance but is still relatively unavailable in this type of database. The first step is to assign a name to the species. After that, it will ask for the taxonomy ID in NCBI. Making use of the search bar, we can select “Cucurbita pepo“.
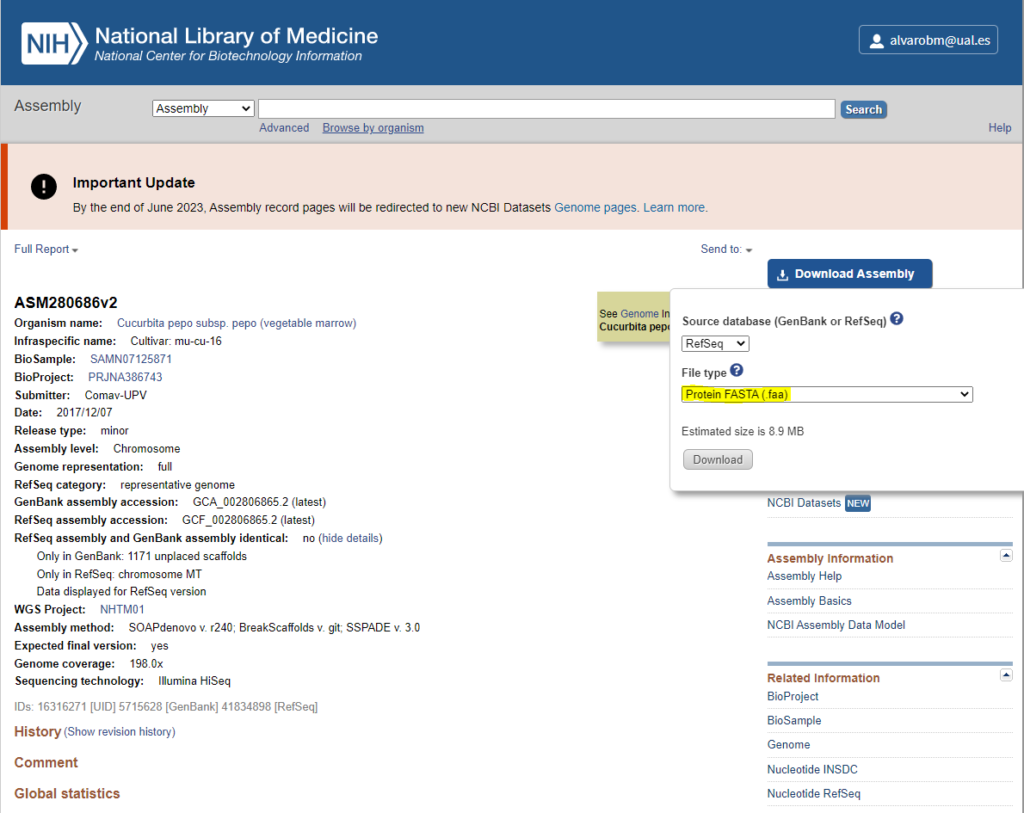
3. Obtaining the FASTA
The third step is to download the fasta from a repository or to upload it if you already have one for the species you are studying. We will upload the proteome of Cucurbita pepo, downloaded from the NCBI. Then, we can click on continue.
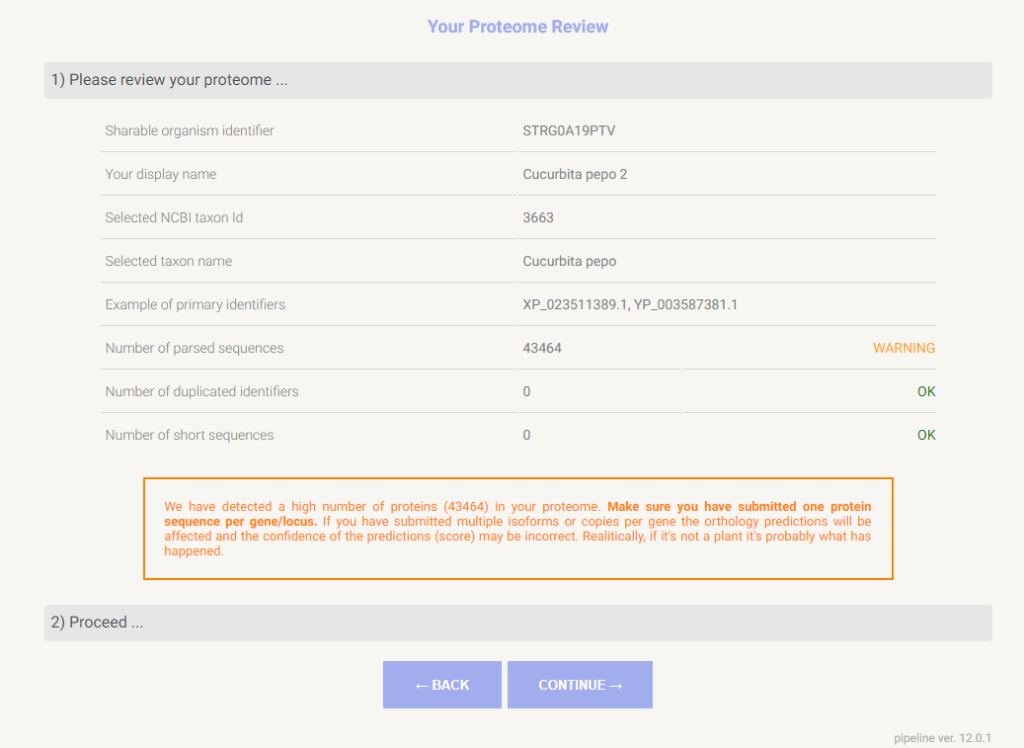
4. Check the Proteome before Starting the Job
A warning arises as a result of a high number of proteins. However, thanks to bibliographic references, we know that Cucurbita pepo has a high number of proteins and protein-coding genes, so the warning is justified, and we can proceed with the analysis.
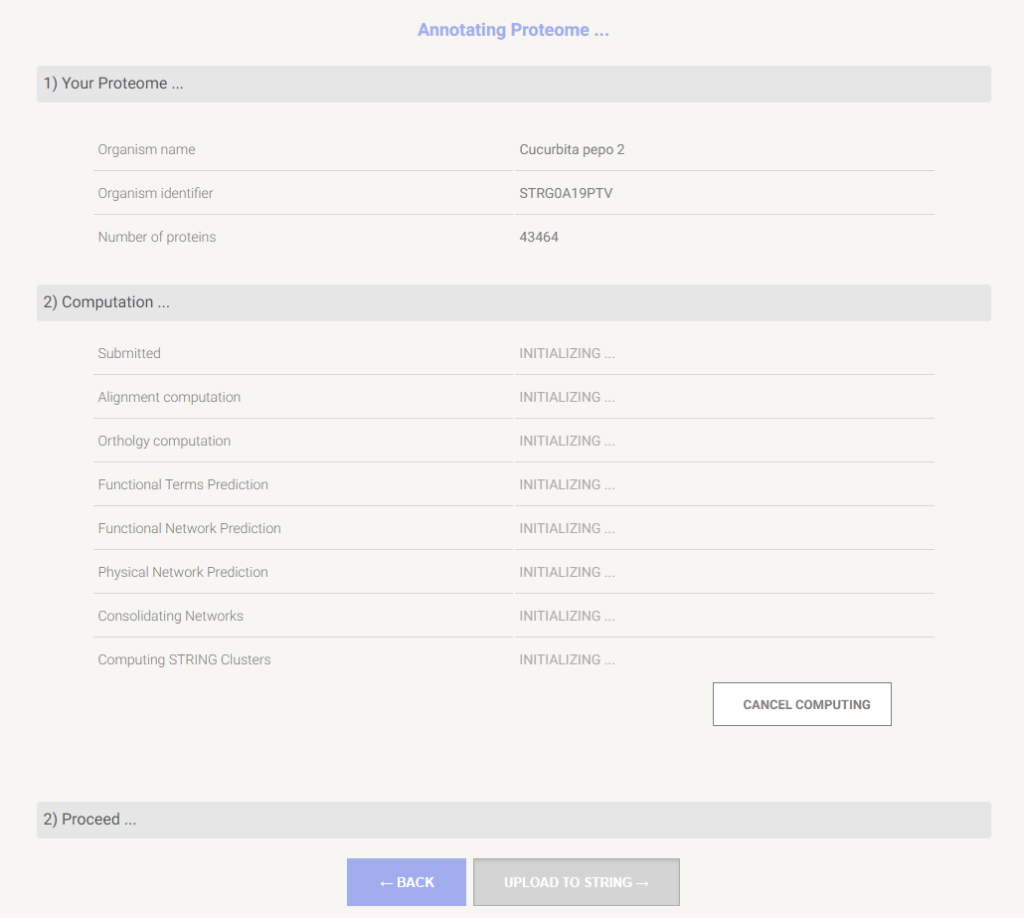
5. Starting the Proteome Analysis
The job is finally uploaded to STRING, where it will be computed. As soon as the “submitted” step is completed, we can safely close the tab or browser. The status of the job can be checked in our user tab-panel “My data”. This example took up to three hours to complete.
6. Accessing the Results
Going to the “My data” tab will not only enable you to browse your annotated proteomes but also access your history, which can be useful when working with complex data and analysis. In the “Your annotated proteomes” section, you can view the generated results. From there, you can perform various actions: you can download all the generated files, and you can also select your species on the input page, enabling you to search the protein network of any specific protein of interest.
Conclusion
In this article, we have covered a good, easy, and fast method to obtain the protein network of interest for any species with an available proteome. In the next article, we will explore how to interpret these networks to gain insights into the analyzed processes.